Shopify Speed Optimization: 13 Techniques to Accelerate Your Store (2026)
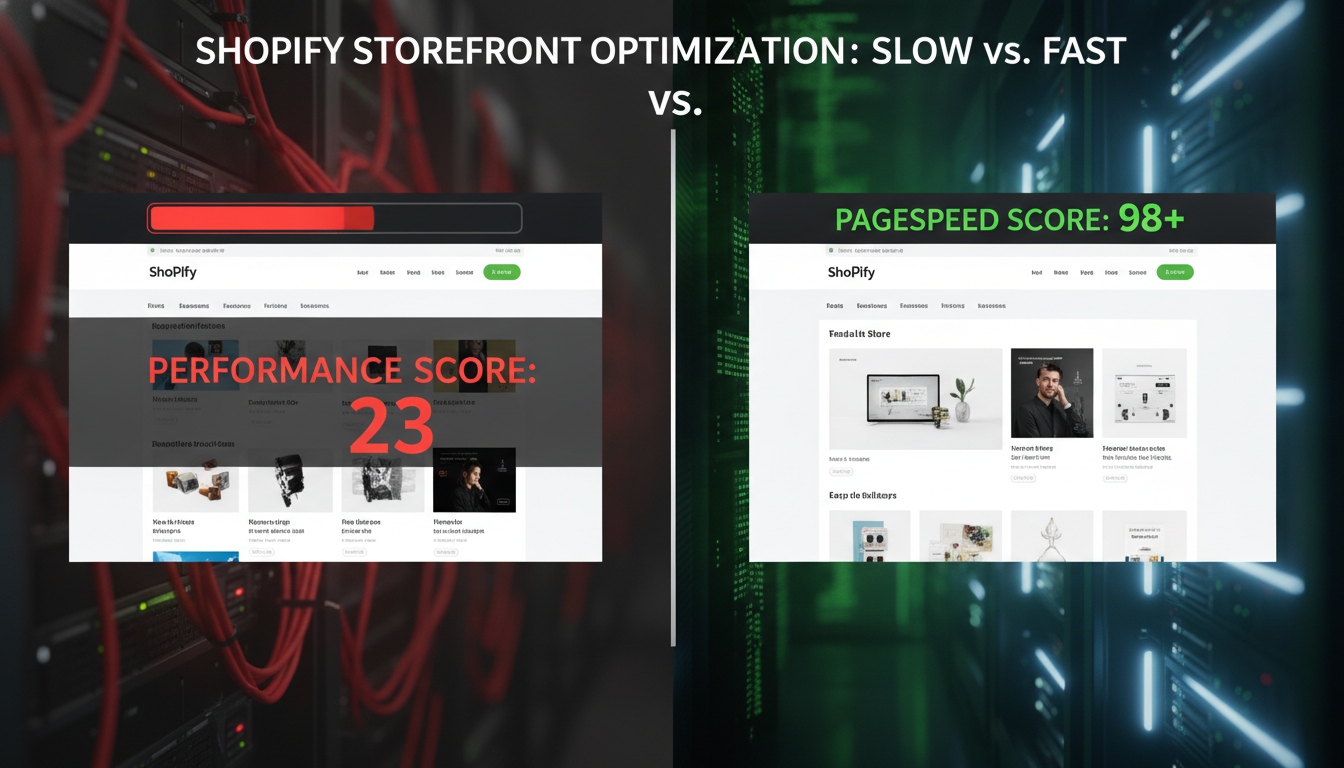
Every second your Shopify store takes to load is costing you real money. A one-second delay in page load time reduces conversions by up to 7% (Portent, 2025) — meaning a store doing $500K/year bleeds $35,000 annually from slow pages alone. If your Shopify store scores below 50 on Google PageSpeed Insights, you’re not just losing conversions; you’re losing organic rankings too, because Core Web Vitals are a confirmed Google ranking signal. Shopify speed optimization is the highest-ROI technical investment most store owners never make properly.
- A store loading in under 2 seconds converts at nearly double the rate of one loading in 5+ seconds.
- Shopify’s global CDN helps, but theme bloat, unoptimized apps, and heavy images are still your biggest enemies.
- Core Web Vitals — LCP, INP, and CLS — directly influence your Google search rankings in 2026.
- You can cut 30–60% of load time without a full rebuild by auditing apps, compressing images, and deferring non-critical scripts.
- Tools like Google PageSpeed Insights, Calibre, and Shopify’s built-in Theme Inspector will expose exactly where your bottlenecks are.
Why Shopify Speed Optimization Matters More Than Ever in 2026
Google’s 2025 Helpful Content update doubled down on page experience signals. Stores with poor Core Web Vitals scores — specifically Largest Contentful Paint (LCP) above 4 seconds and Interaction to Next Paint (INP) above 500ms — are being actively suppressed in SERPs. This isn’t theory; SEMrush’s 2025 Ranking Factors study found a statistically significant correlation between LCP under 2.5 seconds and top-10 rankings across ecommerce verticals.
Beyond SEO, the business case is brutal in its clarity. According to Deloitte’s Mobile Consumer Survey, a 0.1-second improvement in mobile load speed increases conversion rates by 8.4% for retail sites. On mobile — where over 72% of Shopify traffic now originates (Shopify Commerce Trends, 2026) — every millisecond counts.
The good news: Shopify’s infrastructure (global CDN, HTTP/3 support, server-side rendering) gives you a strong foundation. The bad news: most stores bury that foundation under bloated themes, redundant apps, and uncompressed 4MB hero images. The 13 techniques below fix that systematically.
What Is Shopify Speed Optimization? (And What It Actually Involves)
Shopify speed optimization is the process of reducing the time it takes for your store’s pages to fully load, render, and become interactive for a visitor — covering both the technical infrastructure and the front-end assets delivered to the browser.
It is not just running your URL through PageSpeed Insights and fixing whatever it highlights. True Shopify speed optimization spans four distinct layers:
- Asset optimization: Images, fonts, CSS, and JavaScript files that are too large or loaded in the wrong order.
- App auditing: Third-party Shopify apps that inject scripts into every page — even pages where they’re irrelevant.
- Theme architecture: Liquid code efficiency, render-blocking scripts, and unnecessary theme features that ship with most premium themes by default.
- Server-level configuration: Caching headers, lazy loading, preconnect directives, and CDN utilization.
Most store owners focus exclusively on images and ignore the other three layers entirely. App scripts alone account for 40–60% of total page weight on the average Shopify store, according to a 2025 HTTP Archive crawl of 50,000 Shopify storefronts. That’s where you need to start.
How to Audit Your Current Shopify Speed: The Right Baseline
Before you touch a single line of code, establish a clean benchmark. Use these four tools in combination — not just one:
- Google PageSpeed Insights (PSI): Go to pagespeed.web.dev and test your homepage, a collection page, and your most visited product page separately. PSI uses real-world Chrome User Experience Report (CrUX) data, making it the most accurate signal for how Google sees your site.
- Shopify Theme Inspector for Chrome: Install this free Chrome extension from Shopify’s official GitHub. It profiles your Liquid template render time, showing exactly which Liquid sections are slowest to render server-side.
- WebPageTest.org: Run a test from a US East server using a Moto G Power device on 4G — this simulates your median mobile visitor. Filmstrip view shows exactly when your above-the-fold content appears.
- Calibre (calibreapp.com): Set up a free account and run weekly automated speed tests. Calibre tracks Core Web Vitals over time so you can see whether your optimizations are actually sticking.
Record your baseline LCP, INP, CLS, Total Blocking Time (TBT), and Speed Index before making any changes. Every optimization should move at least one of these metrics measurably.
The 13 Shopify Speed Optimization Techniques
1. Audit and Remove Dead-Weight Apps
This is the single highest-impact action you can take. Every app you install in Shopify has the potential to inject JavaScript and CSS into your storefront — often on every page, not just where the app is used. Go to your Shopify Admin → Apps and make a list of every installed app. Then open WebPageTest, click “Waterfall” view, and trace each third-party script domain back to its app.
Remove any app you haven’t actively used in 90 days. For every remaining app, ask: does it load scripts on pages where it serves no function? Tools like Request Map (requestmap.webperf.tools) visualize third-party script sprawl instantly.
2. Compress and Convert Images to WebP
Shopify’s CDN automatically serves WebP to browsers that support it — but only if your original images are uploaded in a supported format and below certain file size thresholds. The target is under 200KB per product image and under 500KB for hero/banner images.
Use Squoosh (free, browser-based) or ImageOptim for batch compression before upload. For existing store images, the app Crush.pics automates retroactive compression without requiring re-upload. Also ensure all images use the loading="lazy" attribute in your theme’s Liquid — in Dawn and most 2.0 themes, go to your theme code and search image_tag to verify this is set.
3. Implement Lazy Loading for Below-the-Fold Content
Any image, video embed, or section that appears below the fold should not be loaded on page initialization. In Shopify OS 2.0 themes, open your theme editor (Online Store → Themes → Customize) and check that sections below the fold don’t have eager-loaded media. In Liquid, add loading="lazy" and decoding="async" to all non-hero image tags.
For video backgrounds — a notorious speed killer — replace autoplay videos with a static image on mobile using CSS media queries and only serve video to desktop users.
4. Preconnect to Critical Third-Party Domains
Your browser must establish DNS lookups and TCP connections to every external domain your store calls — Google Fonts, Klaviyo, Meta Pixel, Hotjar, etc. Adding preconnect hints in your theme’s <head> tells the browser to start these connections before it even encounters the scripts that need them.
In your Shopify Admin → Online Store → Themes → Edit Code → theme.liquid, add preconnect tags for your top 3-5 third-party domains:
<link rel="preconnect" href="https://static.klaviyo.com" crossorigin>
<link rel="preconnect" href="https://connect.facebook.net" crossorigin>
<link rel="preconnect" href="https://fonts.gstatic.com" crossorigin>
This alone can cut 200–400ms from your LCP on first visits.
5. Self-Host Google Fonts (or Use System Fonts)
Loading fonts from Google’s CDN introduces an additional DNS lookup, a connection, and a render-blocking request. The fastest approach is to use system fonts (no external request at all). The second-best approach is to self-host your Google Fonts directly in your Shopify theme assets.
Use the google-webfonts-helper tool (gwfh.mranftl.com) to download WOFF2 font files, upload them to Shopify Admin → Online Store → Themes → Edit Code → Assets, then reference them in your base.css using @font-face with font-display: swap.
6. Defer Non-Critical JavaScript
JavaScript that doesn’t affect above-the-fold content should never block rendering. In your theme’s theme.liquid, find <script> tags for non-critical functionality and add the defer attribute. For scripts loaded via Shopify’s ScriptTag API (mostly app scripts), check each app’s settings — some allow you to configure load priority. For everything else, use a tag manager like Google Tag Manager with custom trigger rules that fire scripts only after the browser’s load event.
7. Minimize and Clean Up Your theme.liquid File
Premium themes like Prestige, Impulse, and Turbo ship with dozens of built-in features — mega menus, age verification popups, countdown timers, loyalty program blocks — most of which you’ll never use. Every unused feature still loads its CSS and JavaScript. In Shopify Admin → Online Store → Themes → Edit Code, go through theme.liquid and remove includes for features not in use.
Also run your CSS through PurgeCSS (purgecss.com) to strip unused selectors — premium themes often carry 60-80% dead CSS weight.
8. Use Shopify’s Native Section Rendering API
If you’re running custom Liquid sections that re-render the entire page on user interaction (filtering, sorting, cart updates), switch to Shopify’s Section Rendering API. This API allows you to request and re-render only a single section — not the full page — dramatically cutting the data transferred per interaction. It’s the foundation of fast filtering and cart drawer UX in modern Shopify stores.
9. Optimize Your Shopify Checkout Speed
Shopify’s hosted checkout is already fast — but checkout extensions and Shopify Plus checkout.liquid customizations can degrade it. If you’re on Plus, audit your checkout.liquid (Shopify Admin → Settings → Checkout → Customize) for any heavyweight scripts. Replace checkout.liquid customizations with Checkout Extensions where possible, as extensions are sandboxed and don’t block checkout rendering.
10. Enable Predictive Prefetching with Instant Page
Instant.page and Flying Pages are lightweight scripts (under 1KB) that prefetch page content when a user hovers over a link — before they’ve even clicked. By the time they click, the page is already in memory. Install either as a theme asset and reference it in theme.liquid just before the closing </body> tag with the defer attribute. This technique routinely reduces perceived navigation time by 30–50%.
11. Configure Your Metafield and Metaobject Data Efficiently
If you’re using Shopify Metafields heavily (for custom product data, sizing guides, comparison tables), ensure you’re calling them via GraphQL in your Liquid rather than making redundant API calls. Excess metafield queries add server-side render time. In Shopify Admin → Settings → Custom Data, audit your metafield definitions and remove any fields that are defined but not actively rendered in your theme.
12. Reduce Shopify App Script Collisions
When apps like Rebuy, Okendo, and LoyaltyLion all fire their scripts simultaneously, they compete for browser thread time and can cause Interaction to Next Paint (INP) scores to collapse. Use browser DevTools → Performance tab → Main Thread to identify Long Tasks (tasks over 50ms). Stagger non-critical app script initialization using setTimeout or requestIdleCallback wrappers in a custom app-loader.js theme asset.
13. Set Up Ongoing Speed Monitoring with Calibre or SpeedCurve
Speed optimization is not a one-time project. Every app update, theme update, and new promotion banner has the potential to regress your performance. Set up automated synthetic monitoring in Calibre or SpeedCurve on a weekly schedule. Configure Slack or email alerts when your LCP exceeds 3 seconds or your PageSpeed score drops below 60. Connect Calibre to your GA4 property to correlate speed regressions with drops in conversion rate.
Shopify Speed Benchmarks: Where Does Your Store Stand?
Use this table to contextualize your current scores against industry benchmarks and the performance thresholds Google uses for Core Web Vitals classification:
| Metric | Good (Green) | Needs Improvement (Orange) | Poor (Red) | Avg. Shopify Store (2026) |
|---|---|---|---|---|
| Largest Contentful Paint (LCP) | ≤ 2.5s | 2.5s – 4.0s | > 4.0s | 3.2s |
| Interaction to Next Paint (INP) | ≤ 200ms | 200ms – 500ms | > 500ms | 380ms |
| Cumulative Layout Shift (CLS) | ≤ 0.1 | 0.1 – 0.25 | > 0.25 | 0.18 |
| Total Blocking Time (TBT) | ≤ 200ms | 200ms – 600ms | > 600ms | 540ms |
| PageSpeed Score (Mobile) | 90–100 | 50–89 | 0–49 | 43 |
| Time to First Byte (TTFB) | ≤ 800ms | 800ms – 1.8s | > 1.8s | 620ms |
Sources: Google Core Web Vitals thresholds (2025), HTTP Archive Shopify crawl (Q1 2026), Calibre Ecommerce Benchmarks Report (2026).
The average Shopify store scores 43 on mobile PageSpeed — well into the “Poor” red zone. If you can get to 65+, you’re ahead of most competitors. If you reach 80+, you’re in the top 10% of Shopify stores globally.
How to Fix Shopify Speed Problems: A Prioritized Action Plan
Most guides give you a list. This is a prioritized sequence — tackle it in this order to get the fastest ROI on your time.
Step 1: Kill Unused Apps First
Go to Shopify Admin → Apps → View all apps. Cross-reference your installed apps with your WebPageTest waterfall. Uninstall any app that loads scripts but isn’t actively generating revenue or reducing workload. Apps charging $29/month that also add 400ms to your LCP need to justify their existence with hard data from your GA4.
Step 2: Compress All Images Before Your Next Campaign
Use Crush.pics or TinyIMG (both available in the Shopify App Store) to batch-compress your existing product image library. Set a store policy: no image uploads over 500KB. Use Shopify’s native image CDN — always reference images using the | image_url Liquid filter with explicit width parameters to serve correctly sized images per viewport.
Step 3: Switch to a Faster Theme or Strip Your Current One
Shopify’s free Dawn theme scores 85+ on mobile PageSpeed out of the box. If you’re running an older theme or a bloated premium theme, benchmark it against Dawn on WebPageTest. If the gap is more than 20 points, a theme migration will outperform any amount of incremental optimization. If you’re staying on your current theme, use the Shopify Theme Inspector to identify and remove the slowest Liquid sections.
Step 4: Audit Your Script Loading Order
In Shopify Admin → Online Store → Themes → Edit Code → theme.liquid, review every <script> tag. Add defer to all non-critical scripts. Add async only to independent scripts (like Google Analytics) that don’t depend on DOM readiness. Move all scripts to just before </body> unless they absolutely must be in <head>.
Step 5: Fix CLS by Reserving Image Dimensions
Cumulative Layout Shift — images and elements jumping around as the page loads — is one of the most common Core Web Vitals failures on Shopify stores. Fix it by always specifying explicit width and height attributes on all <img> tags in your Liquid templates. For banners and hero sections, use CSS aspect-ratio boxes to reserve space before the image loads.
Why Shopify Speed Problems Happen: The Root Causes
Understanding why your store is slow makes every fix more effective and prevents you from solving the symptom while ignoring the cause.
The #1 root cause is app accumulation over time. When you launch a Shopify store, you install five apps. Within 18 months, you’ve installed twenty-three — each one solving a specific problem at a specific moment. Nobody ever audits them collectively. Their combined JavaScript payload can easily exceed 2MB, which on a 4G mobile connection takes 3-4 seconds just to download, before execution even begins.
The #2 root cause is theme feature bloat. Premium themes sell on feature count. Merchants pay for themes with 40 built-in features and use 8 of them. The other 32 still load their assets. A theme that scores 85 on PageSpeed in a clean demo environment can score 35 in a real store with real apps installed.
The #3 root cause is poor image discipline. Product photographers deliver 10MB RAW-quality images. Someone uploads them directly to Shopify. Multiplied across 500 SKUs, this creates a library where every product page triggers multiple 3-5MB image downloads. Even with Shopify’s CDN doing heavy lifting, the original file size sets the ceiling on how small the CDN-optimized version can be.
The #4 root cause is render-blocking third-party scripts. Meta Pixel, TikTok Pixel, Hotjar, Klaviyo, and Attentive — all excellent tools individually — each add synchronous script requests that pause page rendering while the browser waits for an external server to respond. One unresponsive third-party server at the wrong moment can add 2+ seconds to your LCP.
Knowing these root causes means you can implement preventive processes — not just reactive fixes.
How to Prevent Shopify Speed Regression: Building a Performance Culture
A store that’s fast today and slow in six months hasn’t been optimized — it’s been temporarily patched. These preventive systems keep your store fast long-term.
Establish a Performance Budget
A performance budget defines hard limits for key metrics: total page weight under 1.5MB, LCP under 2.5 seconds, no more than 8 third-party script domains per page. Document this in a shared team doc. Every new app installation and every theme change must be evaluated against this budget before going live. Use Lighthouse CI (github.com/GoogleChrome/lighthouse-ci) in your deployment pipeline to automatically fail deploys that break your budget.
Use a Staging Environment for Every Change
Shopify’s theme duplication feature (Online Store → Themes → Duplicate) gives you a free staging environment. Make every theme change on a duplicate first, test it in PageSpeed Insights and WebPageTest, then publish only if performance is maintained or improved. This applies to app installs too — install on a preview theme and benchmark before enabling on your live store.
Implement Quarterly App Audits
Every 90 days, run a formal app audit. Pull your GA4 revenue attribution data to identify which apps are genuinely contributing to conversions. Cross-reference against your WebPageTest waterfall to see what each app costs in page weight and render time. Any app with no measurable revenue contribution and a load cost above 100ms gets removed. This discipline alone keeps most stores under control.
Monitor with Automated Alerts
Connect your Calibre or SpeedCurve account to Slack. Set a threshold alert for any week where your LCP increases by more than 0.5 seconds or your mobile PageSpeed score drops by more than 5 points. Catching regressions within days — instead of discovering them weeks later when you notice conversion rates tanking — is the difference between a 30-minute fix and a 3-day investigation.
Train Your Team on Performance Basics
Most speed regressions are caused by non-developers: a marketer uploads a 5MB banner image for a flash sale, or an email team installs a new popup app without consulting anyone. Create a one-page internal guide covering: maximum image file sizes, the approval process for new app installations, and who to contact before making changes to theme.liquid. Operational discipline prevents more speed problems than any technical fix.
Shopify Speed Optimization vs. Headless Commerce: When to Consider Going Headless
Headless Shopify — decoupling the front-end from Shopify’s Liquid rendering engine and rebuilding it in Next.js, Nuxt, or Hydrogen — can deliver PageSpeed scores of 90+ consistently. But it’s not the right call for every store, and it’s definitely not the first call to make.
Consider headless only when:
- Your store does over $3M/year and speed is a demonstrably proven conversion constraint (measured, not assumed).
- You have an in-house engineering team or budget for a specialist agency to maintain a custom front-end.
- Your current Liquid theme has been maxed out — you’ve implemented all 13 techniques above and are still stuck below 60 on PageSpeed.
For stores under $3M/year, Shopify OS 2.0 themes like Dawn or Taste, combined with disciplined app management and the 13 techniques above, can realistically achieve 75–85 on mobile PageSpeed without a rebuild. That’s where the majority of your speed work should happen first.
Measuring the Revenue Impact of Your Speed Improvements
Once you’ve implemented optimizations, you need to quantify the business impact — both to validate the work and to build the case for ongoing investment. Use this approach:
- In GA4: Go to Explore → create a new Exploration. Add “Session default channel group” and “Landing page” as dimensions. Add “Conversions” and “Session conversion rate” as metrics. Filter to the 90 days before and 90 days after your optimization work. Control for traffic source mix changes.
- In Hotjar: Compare funnel drop-off rates on your homepage → collection page → product page → cart flow before and after. Look specifically at mobile funnel completion rate — this is where speed improvements have the most visible impact.
- PageSpeed Insights over time: PSI’s CrUX data takes 28 days to reflect real-world improvements. Check back monthly, not daily, and compare your “Field Data” (real users) not just “Lab Data” (simulated).
A realistic outcome: A store implementing techniques 1–7 from this list typically sees a 15–25% improvement in mobile PageSpeed score, a 10–20% reduction in bounce rate on mobile, and a 5–12% lift in mobile conversion rate within 90 days. Those numbers compound — a 10% conversion rate lift on $500K revenue is $50K/year, recurring.
Final Thoughts on Shopify Speed Optimization
Shopify speed optimization is not a technical checkbox — it’s a revenue lever you control directly. The 13 techniques in this guide cover the full spectrum from zero-code quick wins (removing unused apps, compressing images) to developer-level optimizations (Section Rendering API, script staggering, preconnect hints). Start with your audit baseline, attack the highest-impact issues first, and build the operational systems to keep your store fast as it scales. A store that loads in under 2.5 seconds on mobile, scores above 75 on PageSpeed, and passes all three Core Web Vitals is not just faster — it ranks higher, converts better, and compounds those gains every single day.